In today’s world of branding, merchandise, and creative expression, enamel pins have become one of the most popular and versatile products. From small businesses and fashion brands to artists and collectors, everyone is embracing their charm. But behind every beautifully finished pin lies a detailed and carefully executed production process. Understanding how custom enamel pins are made helps creators, brands, and buyers appreciate the craftsmanship and make better design decisions.
High-quality enamel pins are not created by accident. They go through multiple stages, including design preparation, mold creation, metal stamping, coloring, polishing, and final inspection. Each step plays an important role in ensuring the final product looks professional, durable, and visually appealing.
Why Custom Enamel Pins Are So Popular
Before exploring the production process, it is important to understand why enamel pins have become such a powerful product in branding and merchandise.
Custom enamel pins are widely used because they are:
- Affordable to produce in bulk
- Highly customizable in design
- Small, lightweight, and easy to distribute
- Collectible and trendy
- Suitable for branding and personal expression
Whether used for marketing campaigns or artistic merchandise, custom enamel pins offer a perfect combination of creativity and practicality.
Step 1: Concept Development and Design
The first step in creating enamel pins begins with an idea. This stage is where creativity meets strategy. Designers decide what the pin will represent, whether it is a brand logo, character, symbol, or artistic illustration.
Key considerations during this stage include:
- Target audience preferences
- Brand identity and message
- Visual simplicity for small-scale design
- Color selection and contrast
- Overall style and theme
Because enamel pins are small, the design must be clear and simple. Overly complex artwork often loses detail during production.
Successful custom enamel pins always start with a strong and well-planned concept.
Step 2: Creating Digital Artwork
Once the concept is finalized, designers move on to creating digital artwork using software like Adobe Illustrator or similar vector-based tools.
This step involves:
- Converting sketches into digital format
- Defining clean outlines
- Assigning color sections
- Preparing a scalable vector file
Vector artwork is essential because it ensures that the design remains sharp and accurate at any size. Manufacturers typically require high-resolution files for production accuracy.
At this stage, designers also consider how the enamel will be divided into metal and color sections.
Step 3: Mold Creation
After the design is approved, the next step is creating a metal mold. This mold acts as the foundation for the enamel pin.
The process involves:
- Transferring the design into a metal plate
- Engraving or stamping the design into steel or iron
- Creating recessed areas for enamel filling
This mold determines the shape and structure of the final pin. Precision is extremely important because even small errors can affect the final product.
For custom enamel pins, mold quality directly impacts design accuracy and detail clarity.
Step 4: Metal Stamping
Once the mold is ready, the design is stamped onto metal sheets. This step creates the physical shape of the pin.
Common metals used include:
- Iron
- Zinc alloy
- Brass (for premium pins)
The stamping process presses the design into the metal, creating raised outlines and recessed areas. These outlines will later separate different enamel colors.
This step defines the structural foundation of all custom enamel pins.
Step 5: Cutting and Shaping
After stamping, the pins are cut into their final shape. This process removes excess metal around the design.
Manufacturers use precision cutting tools to ensure:
- Smooth edges
- Accurate shapes
- Clean outlines
Pins may be shaped into circles, squares, custom logos, or completely unique outlines depending on the design.
This step ensures the pin matches the intended artistic vision.
Step 6: Polishing and Surface Preparation
Before adding enamel color, the metal surface is polished to remove imperfections and smooth out rough edges.
This step includes:
- Cleaning the metal surface
- Removing sharp edges
- Preparing areas for enamel filling
Polishing ensures that the final custom enamel pins look clean and professional. It also improves durability and comfort when worn.
Step 7: Adding Enamel Color
This is one of the most important and visually impactful stages of production. Colored enamel is carefully filled into the recessed areas of the metal design.
There are two main types of enamel used:
Soft Enamel
- Color sits slightly below metal lines
- Creates a textured surface
- Offers bold color contrast
Hard Enamel
- Enamel is filled and polished flat
- Smooth, jewelry-like finish
- More durable and premium appearance
Each color is carefully applied using precision tools to ensure accuracy. This stage brings custom enamel pins to life visually.
Step 8: Baking and Hardening
After enamel is applied, the pins are baked at high temperatures to harden the colors.
This process:
- Strengthens enamel durability
- Fixes colors in place
- Prevents fading or damage
Baking ensures the pins maintain their vibrant appearance over time.
Step 9: Final Polishing and Surface Finishing
Once the enamel is hardened, pins go through final polishing.
This step enhances:
- Shine and smoothness
- Metal edges
- Overall appearance
For hard enamel pins, this stage is especially important because it creates a flat, glossy surface.
High-quality custom enamel pins always have a refined and polished finish.
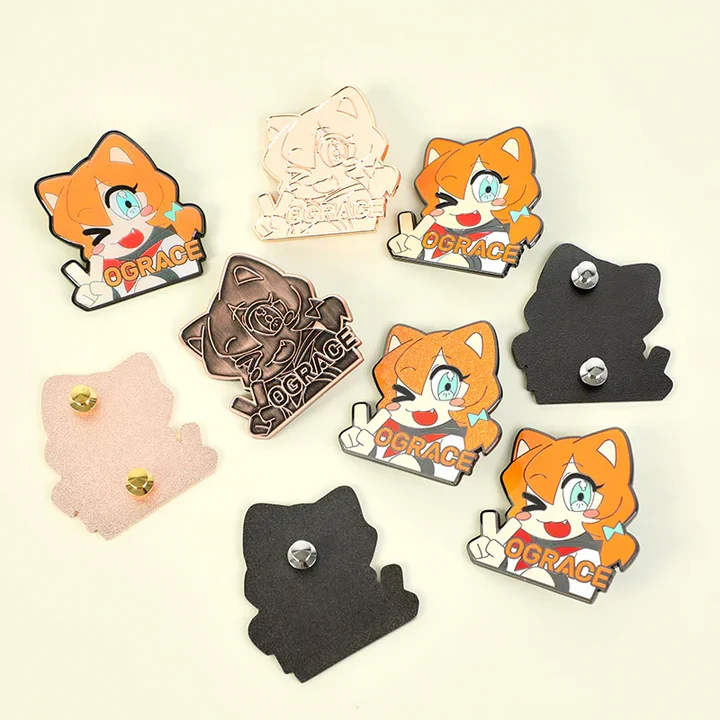
Step 10: Plating and Coating
The final look of enamel pins depends heavily on plating. This is the metal coating applied to the pin’s surface.
Popular plating options include:
- Gold plating
- Silver plating
- Black nickel
- Antique finishes
Plating adds both aesthetic value and protection against corrosion.
Step 11: Attachment of Backing
To make pins wearable, manufacturers attach a backing mechanism.
Common types include:
- Rubber clutches
- Butterfly clasps
- Magnetic backs
- Safety pin backs
The choice depends on the intended use and design style.
This step ensures that custom enamel pins are functional and easy to wear.
Step 12: Quality Control Inspection
Before packaging, every pin goes through strict quality control checks.
Manufacturers inspect:
- Color accuracy
- Structural integrity
- Surface smoothness
- Metal alignment
- Defects or imperfections
Only pins that meet quality standards move forward to packaging.
This ensures consistency in all produced pins.
Step 13: Packaging and Presentation
The final step is packaging. Packaging is important because it affects customer experience and brand perception.
Common packaging options include:
- Plastic bags
- Velvet pouches
- Custom branded cards
- Display boxes
Well-packaged custom enamel pins feel more premium and collectible.
What Makes High-Quality Enamel Pins Stand Out
Not all enamel pins are created equal. High-quality pins stand out due to:
- Sharp and detailed mold design
- Smooth enamel filling
- Vibrant and accurate colors
- Strong plating finish
- Durable construction
Quality determines how long the pin lasts and how professional it looks.
Common Mistakes in Production
Even small mistakes can affect final quality. Common issues include:
- Poor design resolution
- Weak metal outlines
- Overcomplicated artwork
- Color bleeding
- Low-quality materials
Avoiding these ensures better custom enamel pins results.
Why Understanding the Process Matters
Knowing how enamel pins are made helps businesses and artists:
- Design better products
- Choose the right manufacturer
- Avoid production errors
- Improve product quality
- Understand pricing structure
It also helps customers appreciate the craftsmanship behind each pin.
Final Thoughts
The process of creating high-quality enamel pins is a detailed and precise journey that combines creativity, craftsmanship, and technology. From initial design concepts to final packaging, every step plays an important role in ensuring a professional and visually appealing product.
Custom enamel pins are more than just decorative items—they are carefully crafted pieces of art that represent brands, ideas, and personal expression. Their growing popularity is a result of both their aesthetic appeal and the complex process behind their creation.
By understanding how they are made, businesses, artists, and collectors can better appreciate their value and make more informed design choices. In the end, high-quality enamel pins are the result of thoughtful design, skilled production, and attention to detail at every stage.